
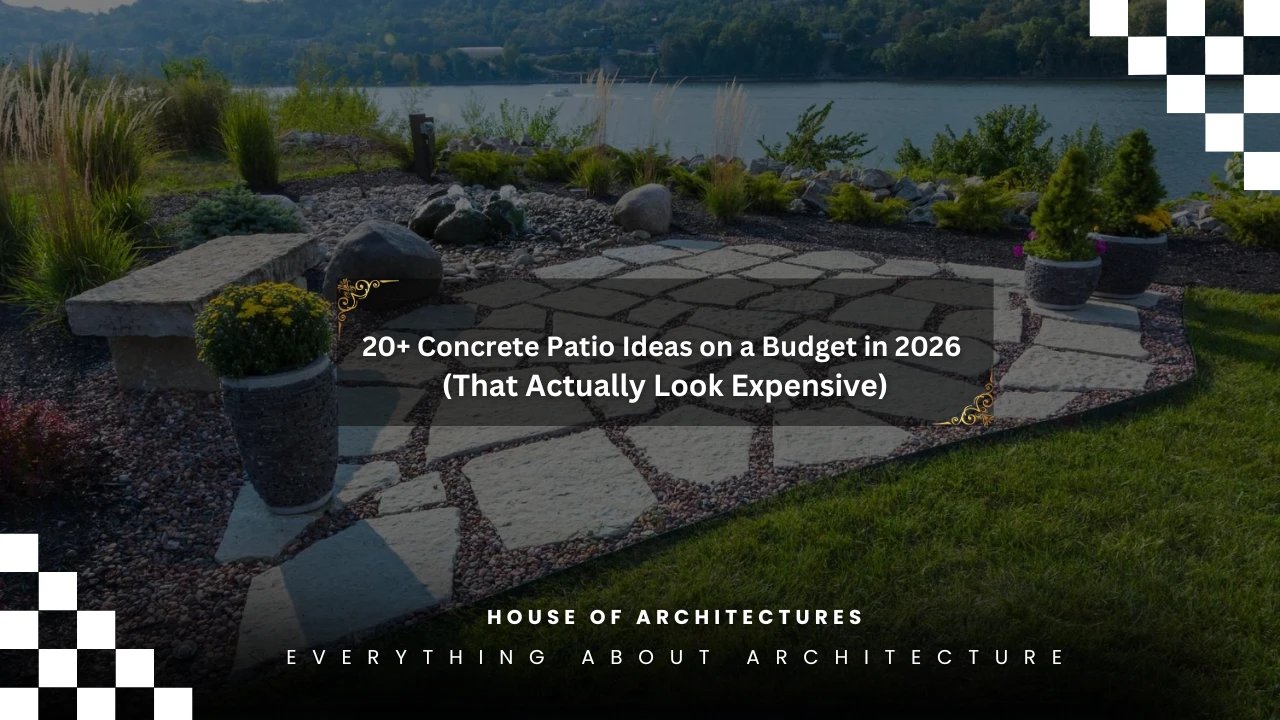
Let me be honest with you: when I first started planning my backyard patio, I nearly choked when I got quotes from contractors. We’re talking $8,000 to $15,000 for a mid-sized patio. I closed those browser tabs, took a deep breath, and told myself there had to be a better way.
Spoiler: there absolutely is.
After months of research, trial and error, and more YouTube rabbit holes than I care to admit, I transformed my sad, weedy backyard into a proper outdoor living space — for a fraction of the cost. And in 2026, the options are even better than they were a few years ago. New materials, smarter DIY products, and creative design techniques mean you can create a stunning concrete patio without draining your savings account.
Whether you’re a weekend warrior who loves DIY or someone who just wants to make smart choices when hiring help, this list of 20+ concrete patio ideas on a budget is for you. Let’s dig in.
Why Concrete Is Still the Best Budget Patio Material in 2026
Before we jump into the ideas, let me make the case for concrete — because I know some of you are eyeing pavers or wood decking.
Concrete is, pound for pound, the most cost-effective hard-surface patio material available. A basic poured concrete patio runs anywhere from $4 to $8 per square foot for materials, compared to $10–$20+ for natural stone or quality pavers. And when you apply some of the finishing techniques I’m about to share, plain gray concrete can look absolutely stunning.
It’s also incredibly durable. With proper sealing, a concrete patio can last 25–50 years. I’ve done the math — that’s a very smart long-term investment.
Alright, let’s get into the ideas.
1. The Classic Brushed Finish Patio
This is where I’d tell any budget-conscious homeowner to start. A brushed or broom-finished concrete patio is the most affordable option on this list, but don’t let “basic” fool you — done well, it looks clean, intentional, and timeless.
The technique involves dragging a stiff broom across the surface of freshly poured concrete to create subtle texture lines. This texture also provides excellent slip resistance, which makes it practical around pools or in rainy climates.
Estimated cost: $4–$6 per square foot (DIY poured slab)
My tip: Use a slightly curved broom stroke rather than straight lines for a more organic, polished look.
2. Stamped Concrete Patterns
This one changed my mind about what “budget” concrete could look like. Stamped concrete involves pressing textured mats into wet concrete to mimic the appearance of stone, brick, slate, cobblestone, or even wood planks.
I watched my neighbor get a stamped concrete patio that looks indistinguishable from expensive flagstone — and he paid about $7–$12 per square foot, compared to the $20–$40 per square foot natural flagstone would have cost him.
If you’re hiring a contractor, stamped concrete is still significantly cheaper than the materials it imitates. If you’re adventurous enough to DIY, rental stamp mats are available at most equipment rental companies.
Popular patterns to consider:
- Ashlar slate
- Cobblestone
- Running bond brick
- Random flagstone
- Wood plank
Estimated cost: $7–$12 per square foot (contractor installed)
3. Concrete Pavers Instead of Poured Slabs
Here’s a secret the industry doesn’t always advertise: concrete pavers (not natural stone pavers) are incredibly affordable and look fantastic. I’ve seen 12×12 concrete pavers at big-box stores for as little as $1–$2 per piece.
The beauty of concrete pavers is that they’re a genuine DIY-friendly option. You don’t need special equipment or professional skills — just a level base of compacted gravel and sand, some edging, and patience.
I laid my own 200-square-foot paver patio over a long weekend. The whole project cost me under $400. That math is hard to argue with.
Estimated cost: $2–$5 per square foot (DIY installation)
My tip: Mix paver sizes (12×12 and 6×12, for example) for a more custom, high-end look without any extra cost.
4. Exposed Aggregate Finish
One of my absolute favorite budget upgrades is the exposed aggregate finish. Here’s how it works: before the concrete fully cures, you wash away the surface layer of cement paste to reveal the natural stones, pebbles, or glass embedded in the mix.
The result is a beautifully textured surface that looks like it belongs in an upscale resort — and it adds serious slip resistance to boot. You can customize the look dramatically by choosing different aggregate materials. River pebbles give a smooth, beachy feel. Crushed granite reads more rustic. Colored glass aggregate creates something truly unique.
Estimated cost: $6–$10 per square foot
5. Concrete Staining on an Existing Slab
If you already have a concrete slab — even an old, stained, or boring one — acid staining or water-based concrete staining might be the most budget-friendly transformation on this entire list.
I used an acid stain on my garage floor as a test run before tackling the patio, and the results were breathtaking. The chemical reaction between the acid and the minerals in the concrete creates rich, marbled, totally unique color patterns that genuinely cannot be replicated with paint.
For an existing slab, this is almost entirely a labor cost project. Staining supplies for a 300-square-foot patio will typically run you $100–$250.
Estimated cost: $1–$3 per square foot (on an existing slab)
Popular stain colors: Hazelnut, terra cotta, sea blue, antique bronze, charcoal
6. Painted Concrete with Stencils
Okay, hear me out — I know “painted concrete” sounds a little arts-and-crafts, but modern concrete paint with geometric stencils can create a jaw-dropping Moroccan or Mediterranean tile effect for almost nothing.
I’ve seen this technique used on covered patios and screened porches where weather exposure is limited, and the results are genuinely stunning. Use a high-quality masonry paint, seal it properly, and you’ve got a patio floor that looks like imported tile at about 5% of the cost.
Estimated cost: Under $1 per square foot
7. Concrete with Inlaid Brick Borders
One of the most elegant budget tricks I’ve encountered is combining poured concrete with inlaid brick borders. The contrast between smooth gray concrete and warm reddish brick creates a sophisticated, structured look that instantly elevates the entire patio.
The bricks are set into the wet concrete along the perimeter before it cures. You can also use them to divide the patio into zones or create geometric patterns within the slab.
Used brick from a salvage yard is often nearly free, making this an incredibly cost-effective upgrade.
Estimated cost: $5–$9 per square foot (combined material cost)
8. Flagstone-Look Scored Concrete
Here’s a technique I genuinely love for its simplicity: scoring the surface of a freshly poured or even existing concrete slab with a circular saw or concrete grinder to create the appearance of flagstone, tile, or geometric patterns.
When you pair this scoring technique with a stain or color wash, the result looks remarkably like real stone — but costs a fraction of the price. I’ve seen this technique done on existing driveways and patios with incredible results.
Estimated cost: $3–$7 per square foot
9. DIY Concrete Stepping Stone Path Leading to a Simple Patio
Instead of one large continuous slab, consider a stepping stone approach that leads into or surrounds a smaller central patio area. Individual concrete stepping stones can be cast yourself using inexpensive molds from craft or garden stores, or even repurposed items like old cake pans.
This approach dramatically reduces your concrete usage while creating a charming, cottage-garden aesthetic. Fill the gaps between stones with gravel, creeping thyme, or moss for a lush, textured look.
Estimated cost: $50–$200 total for a modest pathway + small central area
10. Concrete with River Rock Mosaic Accents
For the creatively inclined, incorporating river rock or mosaic tile accents into a concrete pour is a stunning and deeply personal touch. Press smooth river stones into wet concrete around a fire pit, along a border, or in a decorative medallion at the center of your patio.
River rock is often available in bulk from landscape supply companies for very little money. The result looks like expensive, custom artisan work — because in a way, it is.
Estimated cost: $5–$8 per square foot
11. Concrete Patio with a Built-In Fire Pit Area
A recessed or defined fire pit zone built right into your concrete pour is one of those ideas that sounds expensive but doesn’t have to be. Simply design your patio with a circular or square recessed area at the center, line it with heat-resistant concrete block or brick, and you’ve got an integrated fire pit that looks completely intentional and custom.
This is best planned during the initial pour, so it costs very little extra if you’re already pouring concrete.
Estimated cost: Add $150–$400 to a standard slab project
12. Polished Concrete Patio
Polished concrete — the kind you see in upscale restaurants and modern homes — is achievable on a budget, especially if you’re working with an existing slab or doing the work yourself with rented equipment.
Diamond grinding pads attached to an angle grinder or floor grinder progressively smooth and polish the concrete surface until it achieves a glossy, mirror-like finish. Seal with a penetrating sealer and you have something that genuinely looks like it costs $30 per square foot — even if your total investment was under $500.
Estimated cost: $3–$8 per square foot (DIY with rented grinder)
13. Two-Tone Colored Concrete
Instead of standard gray, integral color concrete (where pigment is added directly to the mix before pouring) gives you rich, consistent color throughout the slab. Pair two complementary colors — say, a warm sand tone for the main slab and a terracotta border — and you’ve got a designer look for a minimal cost increase.
Integral color pigments typically add only $0.50–$1.50 per square foot to your concrete costs.
Estimated cost: $5–$8 per square foot
14. Concrete Patio with Gravel Gaps
Here’s a modern landscaping trend that’s both visually striking and genuinely budget-friendly: concrete slabs with intentional gravel-filled gaps. Instead of pouring one continuous slab, you pour individual sections separated by 2–4 inch gaps filled with decorative gravel, river rock, or ground cover plants.
This technique reduces your total concrete volume (saving money), adds excellent drainage, and creates a contemporary, architectural aesthetic that’s very on-trend in 2026.
Estimated cost: $3–$6 per square foot
15. Stenciled Outdoor Rug Effect on Concrete
This is one of the cleverest ideas I came across during my research. Using painter’s tape and masonry paint or concrete stain, you can create the visual effect of an outdoor rug directly on your concrete slab.
Geometric patterns like chevrons, diamonds, or stripes work beautifully and are surprisingly easy to execute with careful taping. Add a border frame and a central pattern, and from a distance, it genuinely looks like there’s a stylish rug anchoring your outdoor furniture.
Estimated cost: $30–$80 in supplies (on an existing slab)
16. Recycled Concrete (Urbanite) Patio
One of the most sustainable and budget-friendly options I’ve seen is using recycled broken concrete pieces — sometimes called “urbanite” — as your patio surface. This is essentially the flagstone aesthetic, but the material is often free or nearly free from demolition sites, renovation projects, or through apps like Facebook Marketplace and Craigslist.
The irregular shapes and varying gray tones create a wonderfully rustic, industrial-chic look. Mortar or compacted sand between the pieces holds everything together.
Estimated cost: $0–$2 per square foot (not counting labor)
17. Concrete Patio with Wooden Pergola Integration
The patio itself doesn’t have to carry all the visual weight. A simple poured concrete slab becomes dramatically more attractive when you integrate it with a DIY wooden pergola. The structure adds shade, vertical interest, and a sense of enclosure that makes the space feel intentional and complete.
Cedar or pressure-treated pine pergolas can be built for $500–$1,500 depending on size, and when combined with a modest concrete slab, the total package feels like a high-end outdoor room.
Estimated cost: $1,500–$4,000 for slab + pergola combined
18. Micro-Topping Over Old Concrete
If you have an existing concrete slab that’s cracked, stained, or just plain ugly, micro-topping or concrete overlay products let you apply a thin skim coat (1/16 to 1/8 inch) of fresh concrete over the top. The new surface can then be stained, polished, or stamped.
This avoids the expensive and disruptive process of demolishing and re-pouring the old slab. Micro-topping kits are available at most home improvement stores, and the results are extraordinary.
Estimated cost: $3–$8 per square foot
19. Concrete Patio with String Light Anchors
This isn’t a surface technique, but it’s a game-changer for ambiance: design your concrete pour to include embedded anchor posts for string lights. Simple galvanized conduit posts set in concrete footings around the perimeter of your patio can support a canopy of warm Edison-bulb string lights overhead.
The lights transform even the plainest concrete slab into a magical evening space. This is one of those upgrades that costs very little but delivers an enormous emotional return.
Estimated cost: $100–$300 for posts and lights
20. Herringbone or Basketweave Scored Concrete
For a truly custom look, ask your concrete contractor (or try it yourself) to score a herringbone or basketweave pattern into the surface of the wet slab using straight-edge guides. These classic patterns have been used in brick and tile work for centuries because they’re visually dynamic and inherently elegant.
Combined with a warm stain color, a scored herringbone concrete patio looks like it belongs in a European courtyard — not a budget backyard project.
Estimated cost: $5–$9 per square foot
21. Concrete Bench and Planter Integration
While technically part of the hardscaping rather than the slab itself, integrated concrete benches and raised planters poured simultaneously with your patio slab create a cohesive, built-in look that would cost a fortune to achieve with stone or custom carpentry.
These elements are formed with simple wooden molds and poured with the same concrete mix. Fill the planters with trailing plants or ornamental grasses and you’ve got a finished, polished outdoor space that looks completely intentional.
Estimated cost: Add $200–$600 to a standard slab project
22. Saltillo-Look Concrete Tiles
Saltillo tiles — those warm, terracotta-toned hand-made tiles from Mexico — are gorgeous but can be expensive and maintenance-heavy. The solution? Concrete tiles cast and stained to mimic the Saltillo look.
Concrete tile molds are inexpensive, and with a warm terra cotta or adobe stain, you can achieve an almost identical effect. This works beautifully for covered patio areas and sunrooms where weather exposure is limited.
Estimated cost: $2–$5 per square foot (DIY cast tiles)
My Top Budget Tips Before You Stars
After all my research and hands-on experience, here are the non-negotiable money-saving tips I’d give to anyone starting a concrete patio project:
1. Get at least three contractor quotes. Prices vary wildly. My first quote was nearly double my third.
2. Buy materials during off-season. Late fall and winter often bring significant discounts on concrete supplies and contractor rates.
3. Do your own demo and prep. If you’re hiring a contractor for the pour, offer to clear the area and dig the base yourself. This alone can save $500–$1,000.
4. Start small and expand. A smaller patio done well beats a larger one done poorly. You can always add sections later.
5. Seal immediately and reseal every 2–3 years. A $50 investment in sealer protects thousands of dollars of concrete work.
6. Ask about leftover concrete. Sometimes contractors have excess mix from other jobs and will pour a small area at a steep discount to avoid waste.
Final Thoughts
Looking back at my backyard patio journey, the thing I’m most proud of isn’t just the money I saved — it’s the fact that I ended up with something I genuinely love and use every single day. My concrete patio has become the heart of our home’s outdoor life: weekend barbecues, morning coffee, evening fires with friends.
And it didn’t require a second mortgage.
The ideas in this list prove that budget and beautiful are not mutually exclusive. Concrete is one of the most versatile, durable, and affordable materials available to homeowners in 2026, and with the right techniques and a little creativity, it can produce results that rival much more expensive alternatives.
Pick the idea that excites you most, start with a small test area if you’re nervous, and don’t be afraid to get your hands dirty. Your dream patio is more achievable than you think.